LaTeXインストールガイド (2013年版)
LaTeXを使って文書を書くには,まずLaTeXを自分のPCにインストールする必要がある. LaTeX用に作られたエディタを使うと,結果をすぐに得ることが出来て便利である. ここではLaTeX用のエディタとしてTeX ShopとTeXworksを紹介. もちろん日本語対応! というのも,もともとLaTeXは日本語に対応していない. そのためアスキーが作成した日本語用LaTeX(pLaTeX)をインストールする. また,エディタも日本語に対応出来るよう試みる.Mac OS X
MacTeXをダウンロード,インストールしよう. これにはLaTeXを使う上で欠かせないプログラム群が含まれている. いわゆるスタータパックだ. Mac用TeXエディタのTeX Shopも同梱されている.
MacTeX - TeX Users Group
上のリンクよりホームページへアクセス. "MacTeX.pkg"をクリックしてダウンロードする. ただ,ファイルサイズが約2.8GBもあるのでPCおよびネットワーク環境に注意.
インストールには4GBほどの空き容量が必要となる. インストール完了後,TeXShopを起動,環境設定を開く.

まずは"書類"タブ. エンコーディングを"Unicode (UTF-8)"へと変更.
"タイプセット"タブ. デフォルトのスクリプトを"TeX + DVI"へと変更.

"内部設定"タブ. TeX + dvips + distiller内Latexの欄を,
"詳細"タブ. pTeX拡張機能"utfパッケージ対応"にチェック. 保存後の処理(日本語濁点問題の対処)"UTF-8-MACをUTF-8に自動変換"にチェック.
これでOKボタンをクリックして適用. その後,TeXShopを再起動する(CmdキーとQキーの同時押しで終了し,もう一度起動する). 後はページ下部にあるLaTeXコードを読み込んで,"タイプセットボタン"をクリック,PDFファイルが表示されれば成功だ!
低速ネットワーク環境向けにファイルサイズの小さな(約90MB)パッケージが上記サイト中の"Smaller Packages"に置いてある. これはエディタやその他便利な周辺ツールが含まれていない基本パックである. 恐らく日本語に対応して(platexが含まれて)いるだろうが,この記録では対象外とする. このパッケージでも日本語の文書が書けた!という人は一報いただけるとありがたいことこの上ない.
ダウンロードが完了したらすぐにインストールしよう.
simpdftex platex --mode dvipdfmx --maxpfb --extratexopts "-file-line-error"
へと書き換え.
Ubuntu 13.04
ターミナルを開き,次のコマンドを入力してレポジトリを加える.
パスワードを入力してEnter(パスワードは表示されない仕様). 上画像のように

早速起動してEditメニューの"Preferences..."を開く. "Editor"タブ. EncodingをUTF-8にする.

"Typesetting"タブ. Processing toolsの+ボタンをクリック.

Name:pdfplatexとし,Program:/usr/local/bin/pdfplatexとする(下画像参照).
引数(Arguments)の+ボタンをクリック,$basenameと入力しOKをクリック. 最後にProcessing toolsの下段,デフォルトにて先のスクリプトpdfplatexを選択すれば設定は以上で終了.

OKをクリックして設定を適用しよう. TeXworksを再起動してから,ページ下部にあるLaTeXコードを読み込んで緑色の矢印ボタンをクリック,PDFファイルが表示されれば成功だ!
sudo apt-add-repository ppa:texlive-backports/ppa
Press [ENTER] to continue or ctrl-c to cancel adding it
と表示されたらEnterで続行. レポジトリを追加しよう.
sudo apt-get update
でレポジトリ内容をアップデート. 完了後,次のコマンドによりtexlive-lang-cjkというパッケージを先ほど更新したレポジトリよりインストールする. これがLaTeX本体である.
sudo apt-get install texlive-lang-cjk
Do you want to continue [y/n]?
にてyを入力してEnter([Y/n]とYが大文字だったらEnterだけでOK). このパッケージは1.3GBほどサイズがあるのでダウンロードおよびインストールにはそれなりに時間がかかる. Errorなんて文字が見えずに処理が終了すればインストール成功だ. これでplatexとdvipdfmxというプログラムがインストールされた. platexは.texファイル(ソースコード)を.dviファイルへと変換してくれ,dvipdfmxは.dviファイルを.pdfファイルへと変換してくれる. しかし.texファイルから.pdfファイルを得たい場合,これでは少々面倒くさい. ということでシェルスクリプトの力をお借りしよう. .texから.pdfへと変換してくれる"pdfplatex"という名前のスクリプトを作ろう. ターミナルに次のコマンドを入力する.
cd ~/
gedit pdfplatex
geditというエディターが表示されるので,次のスクリプトを入力して保存する.
#! /bin/sh
platex -synctex=1 "$1" && dvipdfmx "`basename "$1" .tex`"
もし,IPAexフォントと呼ばれるフォントを使いたい場合,上のスクリプトを入力するよりも,次のスクリプトを入力しよう.
その後,次の操作をする.
#! /bin/sh
platex -synctex=1 "$1" && dvipdfmx -f ptex-ipaex.map "`basename "$1" .tex`"
chmod +x pdfplatex
sudo cp -p pdfplatex /usr/local/bin
これでpdfplatexなるスクリプトは然るべき場所へとコピーされた.
ls /usr/local/bin | grep pdfplatex
と入力してpdfplatexという出力を得られたら一先ず順調であることが確認出来る. お次はエディタ. Ubuntu Software Centerにて"texworks"を検索. 見つかったらTeXworksをインストールしよう.
Windows
TeXインストーラを使えば,Windowsでも比較的簡単にTeXをインストールすることが出来る. 下にリンクを設けた.
TeXインストーラ3
ダウンロードより,TeXインストーラ(フォルダ名はabtexinst)最新版とプラグイン集をダウンロードしよう. zipファイルであるので解凍をする.
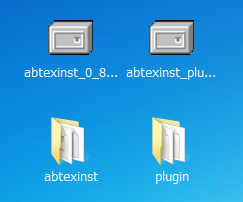
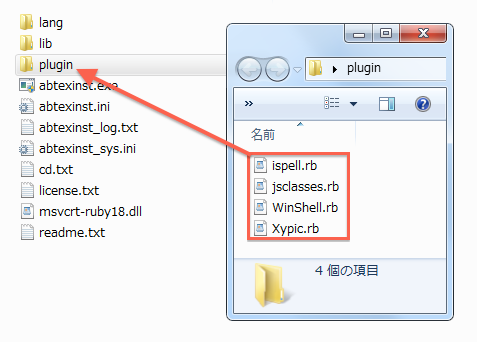
"最新版"と"プラグイン"zipファイルを解凍した様子.
プラグイン集"plugin"フォルダ内のファイルすべてを,abtexinstフォルダ内の"plugin"フォルダ内へとコピーすれば準備完了だ.
abtexinstフォルダ内の"abtexinst.exe"なるプログラムを起動すると,インストーラが立ち上がる.
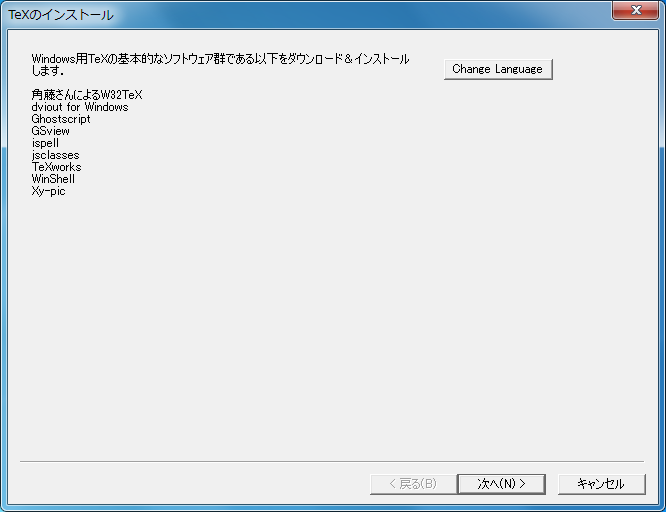
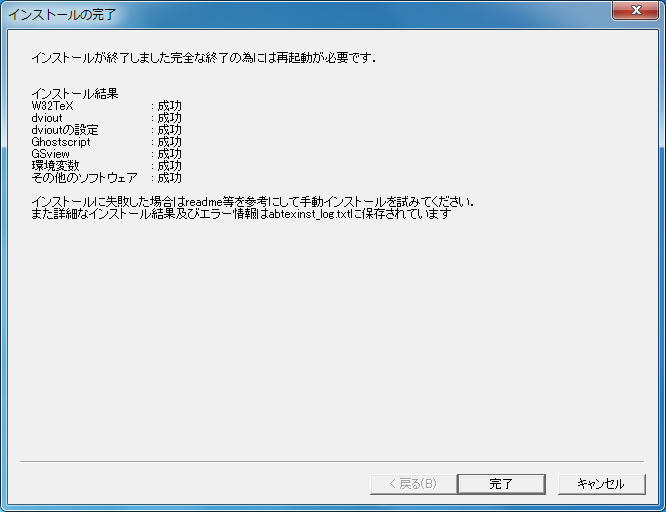
インストーラの画面. これからインストールされるプログラム一覧を見ることが出来る.
特にこだわりが無ければ,"次へ"ボタン連打でインストールは終了する. 作者曰く,稀にインストールの失敗が起こるらしい. 失敗した時はTeXインストーラのサイトへ行ってドキュメントを覗いてみよう. インストール中何度かファイルのダウンロードのために待つ必要がある. 少し待つと,次のインストーラが立ち上がる.
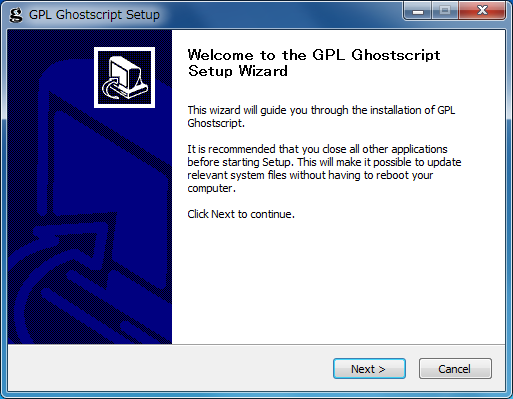
Ghostscriptとよばれる処理系のインストーラ
"Next >" → "I Agree" → "Install" →待つ→ "Finish"でGhostscriptのインストールは完了する. すると勝手にReadme.txtが開かれるが,今はTeXのインストール作業に集中するため,無視してしまっても構わないだろう. 次はGSviewなる変換プログラムのインストーラが立ち上がる.
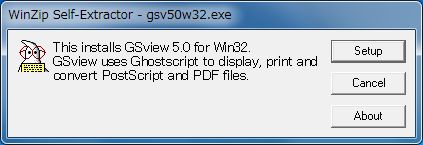
"Setup" → "English" → "Next >"を数回クリック → "Finish >" → "Exit"の順にクリックすると良い. これでGSviewはインストールされた. この後は,dvioutをインストールするディレクトリの指定,ispellのシステム辞書インストール先,Homeの場所指定といったコンソールが表示されるので,"OK"をクリックして設定しよう. Win Shellのインストーラでも同じ要領で,"次へ" → "同意"にチェック → "次へ >"を数回クリック → "完了"にてインストールは終了する.
ここまでエラー無しでインストール出来ると,どこか清々しい.
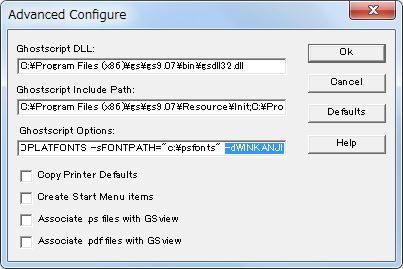
この後,コンピュータの再起動を促されるので,先のごとく素直に従う. 再起動し終えるとGSviewのフォルダが開かれているかと思う. 開かれていなければ"スタート" → "すべてのプログラム"からGSviewを探して立ち上げよう. 起動後,GSview Registrationというコンソールが表示されたら"OK"をクリックしてしのごう. メニューバーの"Option" → "Advanced Configure"を開き,"Ghostscript Options"欄に,
これで設定は完了. 間違い無ければTeX環境が整った! さて,TeXworksを起動し,ページ下部にあるLaTeXコードを読み込んで緑色の矢印ボタンをクリック,PDFファイルが表示されれば成功だ. 阿部紀行氏に感謝である!
-dWINKANJI
を追記する.
TeXファイルからPDFをつくる
次のソースコードをエディタに入力して,拡張子.texのファイルとしてUTF-8エンコーディングで保存,PDFファイルを作成しよう.
以上!
\documentclass[a4paper,12pt]{jarticle}
\pagestyle{empty}

\begin{document}
{\Large \LaTeX{}文書 試し書き\cite{first}}

\section{Laplace Transform\cite{second}}
Laplace Transformのような難しい数式でも,\LaTeX{}を使えば,美しく描けます.
\begin{itemize}
\item 順変換:\ \[ \mathcal{L}[f(t)] = F(s) = \int\limits_{0}^{\infty} f(t)e^{-st}dt \]
\item 逆変換\cite{third}:\ \[ \mathcal{L}^{-1}[F(s)] = f(t) = \lim_{\lambda \rightarrow \infty}\frac{1}{2\pi{}i} \int_{\sigma-i\lambda}^{\sigma+i\lambda}F(s)e^{st}ds \]
\end{itemize}
他にも数多くの数式に対応出来るよう,様々な記号を用いることが出来る.

\section{よりよい文書作成に}
下に示すように,参考文献欄を設けることも出来る. また,文書のインデントも勝手に加えてくれる. 出力はベクタ形式なので,いくら拡大しても綺麗.

\begin{thebibliography}{9}
\bibitem{first}\LaTeX
\bibitem{second}Pierre-Simon Laplace
\bibitem{third}Mr. Aoyagi.
\end{thebibliography}

\end{document}
お使いのPC環境によっては,バックスラッシュ"\"が半角の円マーク"¥"に置き換わる場合があるが,特に問題は無い. 上のソースコードが下のPDFのように表示されれば,LaTeXのインストールは大成功だ!
参考元
- http://blog.goo.ne.jp/superspeed1963/e/09803682db0044e5bb3e5f6d5674c95c
- http://oku.edu.mie-u.ac.jp/~okumura/texwiki/?TeXworks%2F設定%2FLinux
- http://www.math.sci.hokudai.ac.jp/~abenori/index.html
5544954672208240966
https://www.storange.jp/2013/06/latex_24.html
https://www.storange.jp/2013/06/latex_24.html
LaTeXのインストール
2013-06-24T21:41:00+09:00
https://www.storange.jp/2013/06/latex_24.html
Hideyuki Tabata
Hideyuki Tabata
 200
200
200
200
 72
72
72
72
200
200
72
72